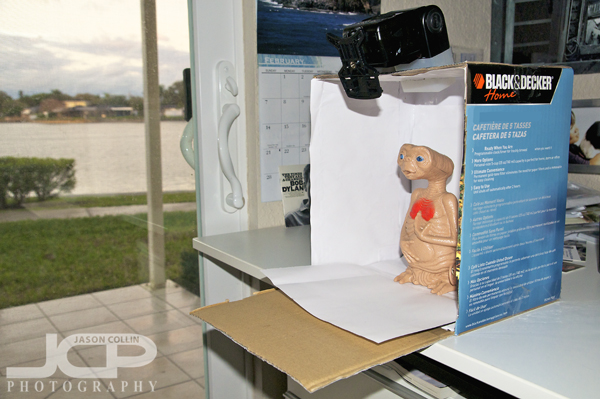
 Where did I get the idea of putting the strobe in the top like that? I already know it was a crazy idea.
Some time ago I read a blog post about making your own lightbox and made a mental note to try it someday. As such mental notes go they can remain in my mind for a few weeks, or even a few decades before they are actualized. Fortunately for me Aya does not have such a lag between idea and doing, as well as a penchant for crafts. So last week I came home one afternoon and Aya said, "tada, a lightbox." I was impressed and excited to give it a try.
Somehow I got the idea that the strobe just goes into the top. Umm, having now done an image search for "DIY lightbox" I realize that it is more important for the sides to be translucent and any opening in the top is optional. Now I know how to get started on version 2!
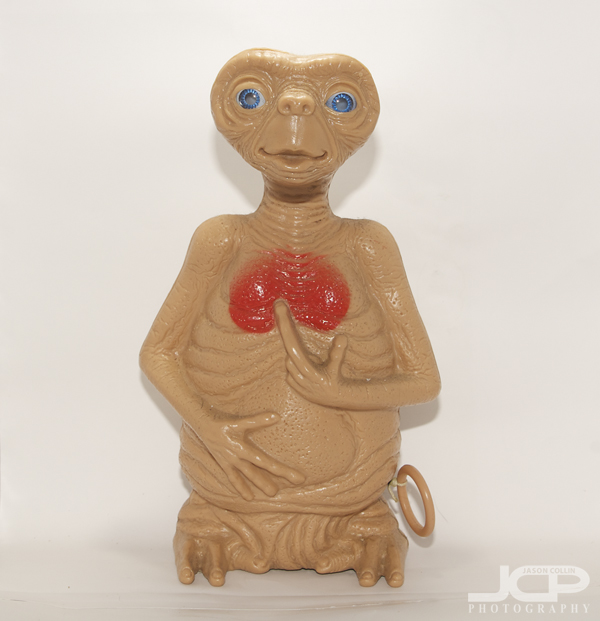
 No shadows were deleted in this dead-on shot of E.T., who normally resides on my desk.
I had no trouble choosing the first test subject for the DIY lightbox, E.T.! I already realize that I need to pose these inanimate objects just like I would a human, otherwise the portrait comes out looking flat. Next time I will photograph E.T. from a slight angle to add depth and a more interesting composition.
 Even at f/14, my Nikkor AF-S 105mm VR micro f/2.8G lens' DoF was too shallow to get both of E.T.'s eyes in focus.
I definitely see now how having two light sources on the sides would make for a much better lightbox. The light really makes E.T.'s right eye sparkle. Getting both to shine like that would have greatly improved the image, as well as eliminated the shadow behind him to frame right.
 Apparently the Sweet Basil was so nervous to be photographed it broke out in a sweat!
Even with just a single strobe above the subject and my D300's on camera flash, almost all shadows were eliminated, which was my first goal with this DIY lightbox experiment.
I learned a lot from this first try, and DIY lightbox version 2 will be greatly improved with side lighting, a single, long sheet of paper to eliminate that crease right at the base of the subject and maybe a larger box overall.
If you have made your own DIY lightbox please share the link in the comments below.
