holga

Guitarist Promotional Materials & Album Cover Shoot Pass-A-Grille Beach Part 2

Commercial Photography for guitarist promotion - f/9 ISO 200 1/250th SB-800 to frame right SB-600 to frame left

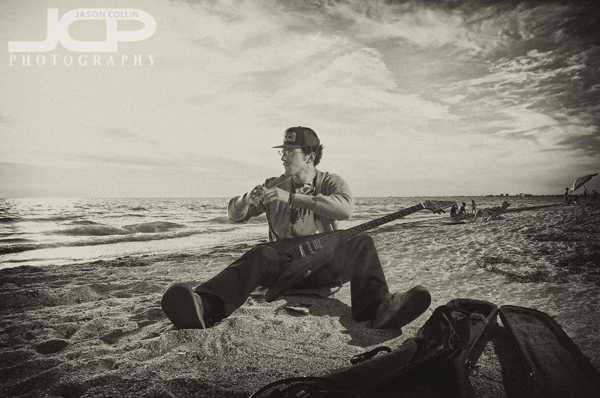
A grainy, holga, look is what guitarist Nathan (artist name Redd Sun) told me he wanted for the edited versions of the photographs I made for him during our commercial photography shoot on Pass-A-Grille Beach.  I kept that information in mind the whole time I was shooting, despite the setting sun providing a plethora of color in the wide Florida sky that evening.  The grainy look is one of the things that interested me most about this shoot because 99% of the time when shooting on the beach vivid color shots are desired.  I saw this as an opportunity to produce something different, something . . . simpler.

Commercial Photography for guitarist promotion - f/4 ISO 200 1/400th natural lightAfter seeing the results of this shoot, I may do an entire series of black & white beach shots.  The holga effect was applied to the above photograph using the awesome Silver Efex Pro, which if you do not have it and you like black & white, then you need to get Silver Efex Pro immediately!

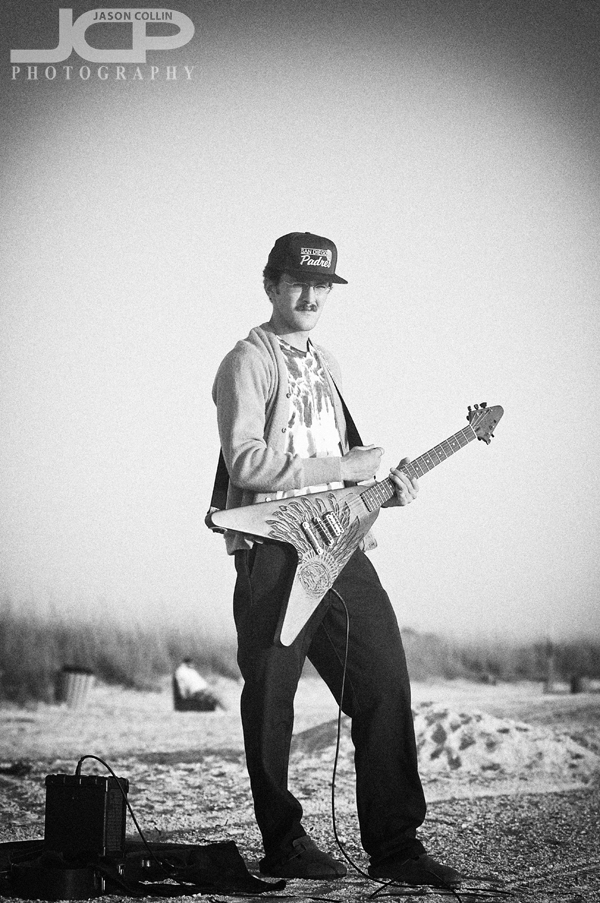
Commercial Photography for musician promotion - f/4 ISO 200 1/400th natural lightI centered the subject (Nathan) much more than I normally would during this shoot because I knew that type of composition best lent itself to the holga effect with its harsh vertical edge burning.  This is why it is always very important to previsualize a shot, or a whole shoot even, before pressing the shutter.

DSLR Photography Lesson with Nicole & her Nikon D5000

Nicole photographs the Walk For Autism with her new Nikon D5000

The heat is on in Florida once again, so maybe my starting time for DSLR Photography lessons will soon need to be moved from 10am to 8am!  By the time I met Nicole for our first lesson we already found ourselves sticking to the shade anytime we were not shooting.  She recently purchased a Nikon D5000 with the two kit lenses, a good starting point for anyone interested in DSLR photography.  Unknown to us the Walk For Autism event was happening right where we were meeting.  This was a nice surprise as we had good subject matter for practicing street photography.  In the above photo you can see Nicole practicing using her medium telephoto 55-200mm lens and AF-C focus mode.  AF-C stands for auto-focus continuous which sets her D5000 to continually set a focus on whatever her focus point is on while she holds the shutter down half-way.  

Nicole demonstrating good one knee shooting technique - holga effect in Silver Efex Pro 3 appliedOne of the first things I teach every DSLR Photography student is simple, solid, good camera holding technique, as soon in the above photo.  The left palm goes under the lens with the left thumb on the outside.  This way your elbows can be locked into your body.  For extra stability you can use the one knee technique.  I often rest one of my elbows on my knee as well.  

Nicole was a fast learner to everything I showed her during the lesson, seemingly retaining most of it the first time!   

  • Reserve your own 1-on-1 DSLR Photography Lesson with Jason today!
  • Learn more about the lessons
  • Browse past lessons with all of my students 
  • Photography Tip -- vanishing point

    Vanishing Point example: f/11 ISO 200 1/640 -1 +/- handheld

    This marks the first in what will be a continuing series of photography tips I will offer.  You can follow them if you find them useful by subscribing or checking back regularly.

    The above photograph is an example of vanishing point composition.  The train tracks are of course parallel to each other, but they appear to converge at a distance.  Where they converge is the vanishing point.  This adds a sense of depth and dimension to a 2D photograph.  Besides train tracks, other subject matter that can be photographed using the vanishing point technique include:  tunnels, winding roads, guard rails, high walled paths.

    These train tracks are across from the University of Tampa campus.  I know there are also train tracks in downtown Tampa and near the brewery at Busch Gardens.  If you live in an area that has a subway system, then you will have lots of vanishing point photography opportunities.

    Vanishing point composition does not need to follow the rule of thirds for composition.  In fact, centering the vanishing point is often the most pleasing composition.  For train tracks, I like to put the camera as low to the ground as possible.  Using a tripod is a good idea too.  As always, set your focus about 1/3 of the way into the frame. 

    Please post a link to your own vanishing point photograph in the comments below!

    How I edited the photograph: 

    • RAW processed in Aperture (Nikon D300 default setting)
    • Exposure correction in Color Efex Pro 3
    • Tonal Contrast filter used in Color Efex Pro 3
    • Unsharp Mask in Photoshop CS4
    • Holga effect filter in Silver Efex Pro 3