photography subjects

Photography Tip - do not photograph flowers in harsh light

Assuming you have a good subject, then light and background are the two make or break factors for any photograph.  Both flower photos above have complimentary backgrounds.  However, only one of them works due to the light.  The top flower photo was made in harsh light.  Even with a large amount of digital editing to try and recover detail in the flower, it was not possible.  In contrast, the bottom flower required very little editing as it was photographed in good, soft light.  

No matter how pretty the flower may be, if it is not photographed in good light, then it will turn out looking ugly in a photograph.  Look for soft light for flowers.  This can be done by photographing flowers in shade and basically avoiding the strong mid-day sunlight times.  Early morning or late evening are often prime times for this kind of light.  Then remember to make sure the background is good too!

Photography Tip - look closer

Sometimes finding an amazing subject is very easy and obvious, like when you are around Mt. Fuji for example.  However, many interesting subjects go totally unseen if one does not make an effort to look closer.  Passing by this tree in South Straub Park I peeked inside a hole on the trunk (as I am apt to do on all trees) to find a small branch (or plant?) growing inside it.  This was a nice surprise.  By looking closer I found a very unexpected subject to photograph.  From the normal photo view of the tree above you can see how easy it would be to just walk right on by without ever seeing it.  This was actually the second time I found such a small plant growing inside a hole in a tree, so I knew from past experience to always peek inside trees for potential hidden wonders.

The final shot I made of this look closer hidden subject going back with a proper macro lens.I actually had to go back a second time to photograph the hidden leaves properly because the first time I only had a wide angle lens with me.  I went back with a proper macro lens and made the above shot.

On your next photo walk be sure and look closer to find surprising photography subjects.  Let me know what you find in the comments below.

Photography Tip - point your shadow at the subject

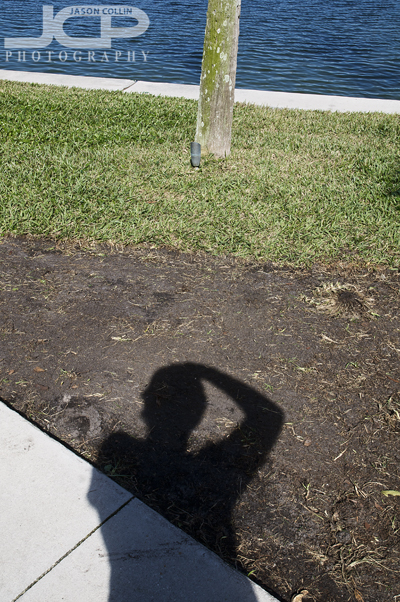
Point your shadow at the subject to get the best exposure chance.Pointing your shadow at the subject is the photography tip I have given the most perhaps.  I have told it to every past photography student (300 and counting!).  The most common way to express this though is to say put your back to the sun to help get the best exposure when shooting outside on a sunny day.  I find it is even easier just to point your shadow at the subject.  For a subject you can move, then definitely place yourself between the subject and the sun so that your shadow is pointing at the subject and your back is to the sun.  Sometimes of course the subject cannot be moved so then you have to compromise or come back at a different time when the sun would be behind you.

For moving subjects I follow this same rule.  I will position myself as much as possible with my shadow pointing in the general area of the subject and wait for it to move in front of me.

Pointing your shadow at your subject will give you the best chance at getting a good exposure throughout the photo when shooting during the day.  It's a very simple way to dramatically improve your final image.  Let me know how it works for you.

Photography Tip - get the subject's head above the horizon

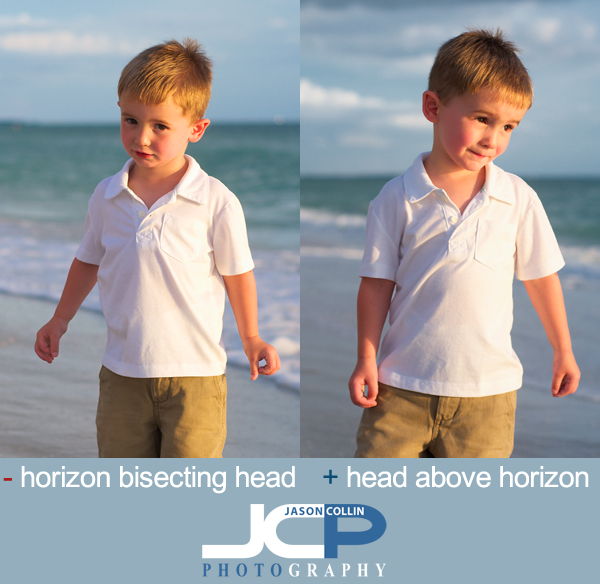
This photography tip is a long time in coming as it is one of the things that bothers me the most, that being having the horizon cut right through the subject's head in portrait photography.  Living in Florida there is never a beach very far away, meaning there is a distinct horizon in the background of photographs.  When composing a portrait, I always make sure the subject's head is above the horizon for a single subject.  Sometimes in group shots with very tall people and kids mixed, it is not always entirely possible, but for sure I will have the adult's heads above the horizon.  

So when you are out shooting on the beach next time, or anywhere that the horizon can clearly be seen, be sure to get the subject's head above the horizon.  The horizon going through the head of the subject is very distracting.  Just get lower when shooting to avoid this.  When photographing children, like in the example above, you may have to get quite low, often going on to one knee.  It is worth it though!

Photography Tip - which lens do I use?

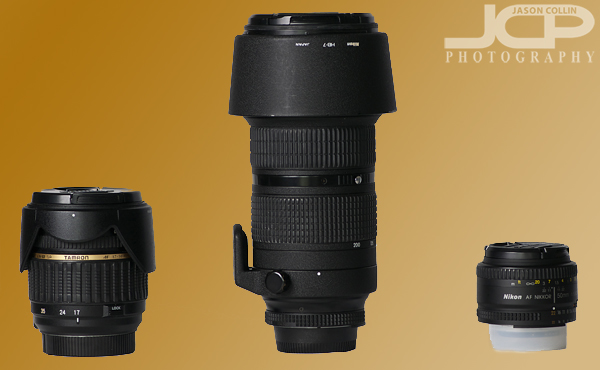
These are 3 of my own lenses, how do I choose which one to shoot with?My photography students often ask me, "which lens should I use?"  To me that question does not make much sense because there is usually no question about which lens to use.  Plus, without a lot more information, the question cannot even be answered.  The real problem is that many people start by asking which lens, or which settings should I use instead of starting with, what is the subject?  That is the question that needs to be asked first and answering it makes which lens to use usually pretty obvious.

Once you determine your subject, then simply choose the lens that fits that subject within the framing you want.  If you want to photograph some friends in your living room, it does not make much sense to use a 70-200mm lens does it as you will not be able to fit everyone in the frame.  Likewise, if you want to photograph a mountain top in the distance, using a 17-50mm lens does not make much sense as you will hardly even be able to see the intended subject in the frame.  

So what your subject is, and how much of your subject you want to get in the frame, dictates which lens you should shoot with.